When a severe microburst rolls off the Grand Mesa or a spring storm sweeps across Western Colorado, the wind doesn’t just blow; it howls. High-altitude gusting winds can peel back shingles in seconds, leaving your home completely open to rain and debris.
In the immediate aftermath, it’s natural to want to grab a blue plastic tarp and climb up to cover the hole. But before you fetch a ladder, there is something critical every homeowner needs to know: does DIY roof tarping void warranty coverage?
Unfortunately, for many homeowners, the answer is yes. Improper tarping methods can tear up good shingles, void manufacturer protection, and complicate insurance claims.
At Bros Roofing, we take pride in giving our Western Slope neighbors honest answers and certified craftsmanship. Let’s break down why DIY tarping risks your warranty, how high-wind emergency tarping techniques actually work, and how to safely triage leaks when a storm strikes.
Key Takeaways
- Warranty Risks: Nailing tarps directly through surrounding shingles breaks manufacturer seals and voids material warranties.
- High-Wind Anchoring: Effective emergency roof tarping in Western Colorado requires wrapping tarp edges around 2×4 battens, never just weighing down corners with bricks or sandbags.
- Insurance Mitigation: Proper, non-destructive tarping satisfies your policy’s requirement to prevent further interior damage without causing new structural harm.
If a recent storm damaged your roof, the team at Bros Roofing is standing by to deliver fast, safe, and warranty-compliant protection.
The Hidden Cost: Does DIY Roof Tarping Void Warranty Protection?
When water is dripping into your attic, grabbing a hammer and nailing a tarp directly into your roof feels like the logical fix. However, major shingle manufacturers (like GAF, Owens Corning, and CertainTeed) have strict installation guidelines.
An improper DIY tarping attempt can instantly compromise your roof’s long-term protection for several reasons.
Unnecessary Shingle Penetrations
Nailing directly through undamaged shingles surrounding the breach punches dozens of new holes straight through your roof’s waterproofing barrier. Manufacturers classify these extra nail holes as intentional damage, which immediately voids the warranty on those shingle courses.
Sealant Strip Destruction
To put a tarp down, DIYers often lift surrounding shingles to find an edge. Prying up cool or sun-baked shingles tears the factory adhesive sealant strips underneath. Once these factory seals break, those shingles will never lay flat or seal properly again, leaving them vulnerable to future wind lift.
Denied Secondary Insurance Claims
Insurance adjusters carefully inspect storm damage. If a DIY tarp fails during the next windstorm and causes fresh ceiling damage, the insurance carrier may rule that the new water intrusion was caused by an improper repair rather than the original storm event.
How to Secure Tarp on Roof in High Wind: Professional Techniques
Down in the Grand Valley and across the High Desert, wind gusts can easily reach 50 to 60 mph during a summer cold front. Simply throwing a tarp over a ridge and placing cinder blocks on the corners will fail the moment the wind catches an edge.
For professional roof tarping in Grand Junction, CO, certified crews use dynamic load-anchoring methods designed to withstand mountain gusts:
The 2×4 Batten Wrapping Method
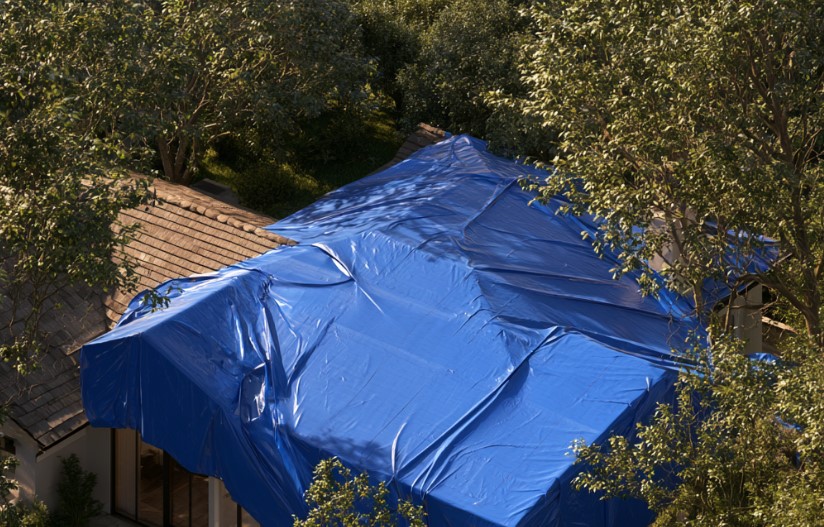
Rather than driving nails through raw plastic, professionals roll the edges of a 10-to-12-mil heavy-duty poly tarp around wooden 2×4 battens twice. This distributes wind resistance across the entire length of the wood strip instead of pulling against individual nail heads.
Anchoring Over the Roof Ridge
A tarp should never end mid-slope on the windward side of a house. High winds will drive rain right under the top edge. The tarp must be carried up and pulled completely over the roof ridge, anchoring on the lee side of the house where water naturally flows away from the seam.
Perimeter Batten Screwing
The wooden battens are secured using corrosion-resistant deck screws driven directly into structural rafters or solid roof decking along the perimeter of the damaged section. Screws provide superior holding power over standard nails and stay tight during severe weather.
Storm Damage Leak Triage: Utah Border to the Grand Mesa
Living near the Utah border and across Western Colorado means dealing with sudden weather changes. When a storm leaves you with an active roof breach, taking the right immediate steps keeps your household safe while you wait for a professional response team.
Here is how to handle storm damage leak triage in Utah and Colorado border communities safely:
- Document from the ground: Before anything is touched or covered, take clear, timestamped photos and videos of the damage from ground level using binoculars or a phone camera.
- Contain the interior water: Place wide plastic bins beneath active ceiling drips. Tie a string from the ceiling drip point down into the bucket to eliminate noisy splashing.
- Relieve ceiling pressure: If drywall is bulging with trapped water, carefully poke a small hole in the middle of the bulge with a screwdriver to drain the water into a bucket and avoid a total ceiling collapse.
- Keep off wet roofs: Never climb onto a wet, steep, or storm-damaged roof structure. High-altitude wind gusts and slick shingles account for a high percentage of severe homeowner falls.
What Happens Next: Moving from Emergency Tarping to Permanent Repair
Getting an emergency tarp secured over a storm breach is a huge relief, but it is only the first chapter of restoring your home. Once the immediate leak is contained, you enter the transition phase: moving from temporary protection to a complete, long-term repair.
Navigating this window smoothly requires a few key steps to ensure your insurance claim stays on track and your roof is rebuilt stronger than before.
1. Documenting Mitigation Expenses
Most homeowners policies include a “Duty to Mitigate” clause, which requires you to prevent further damage after a storm. Keep every invoice, material receipt, and photo from your emergency tarping service. These documents are submitted directly to your adjuster as emergency mitigation expenses, which are handled separately from your main repair payout.
2. Coordinating the Adjuster Walkthrough
An emergency tarp should stay securely in place until your insurance adjuster arrives. However, the tarp must not hide the extent of the underlying damage. When Bros Roofing handles your tarping, we capture high-resolution images of the bare decking and damaged shingles before the tarp goes down. We share this documentation directly with your adjuster so they have clear evidence without needing to tear off your temporary protection prematurely.
3. Upgrading for Future Western Slope Weather
When it’s time to complete the permanent repair, don’t just settle for a quick patch. Use the opportunity to upgrade the vulnerable areas of your roof:
- Synthetic Underlayment: Replace traditional felt paper with heavy-duty synthetic underlayment that provides a secondary water barrier.
- High-Wind Rated Shingles: Choose replacement shingles rated for 110–130 mph gusts to handle mountain microbursts.
- Ice and Water Shields: Confirm rubberized self-adhering membranes are installed along roof eaves and valleys where water naturally concentrates.
By taking these proactive steps, you transform a sudden storm emergency into a long-term improvement in your home’s structural defense.
Emergency Roof Tarping FAQs
Why do standard blue tarps fail so quickly in Western Colorado?
Thin 5-mil blue tarps sold at general hardware stores are meant for flat storage, not sloped roof wind loads. Our intense high-altitude UV radiation degrades thin plastic within days, while mountain wind gusts easily rip standard grommets right out of the fabric.
Will insurance reimburse me for professional emergency roof tarping?
Yes. Most homeowners policies require you to take immediate action to mitigate further loss after a covered storm event. Reasonable costs for professional tarping services are generally reimbursable as part of your overall storm damage claim.
How long can an emergency tarp safely stay on my roof?
An emergency tarp is a temporary bridge, not a permanent fix. While a professionally anchored tarp can last 30 to 90 days, you should schedule permanent repairs as soon as material matching and insurance approvals are complete to avoid moisture build-up underneath.
What should I do if a tree branch punctures my roof during a storm?
Leave the branch in place if it is still embedded in the roof deck. Removing it during an active storm opens a larger hole for water. Contain the interior drip first, keep clear of the area, and call a professional crew to remove the debris and seal the deck safely.
How does Bros Roofing protect my shingle warranty during an emergency call?
Our crews anchor tarps using wooden battens secured strictly within damaged decking areas that are already scheduled for replacement. We avoid puncturing undamaged surrounding shingles, keeping your manufacturer warranty fully intact.
Protect Your Home and Your Warranty with Local Experts
A storm can feel overwhelming, but securing your home doesn’t have to be. Taking the right steps after severe weather keeps your family safe, protects your insurance claim, and preserves the long-term investment you’ve made in your roof.
At Bros Roofing, we are family-owned, community-rooted, and proud to serve our Western Slope neighbors with honest assessments and certified craftsmanship. We treat every home like our own, delivering fast, reliable, and warranty-compliant emergency protection when you need it most.
If high winds or heavy storms have damaged your roof, don’t take unnecessary risks on a wet ladder. Schedule your free estimate or emergency inspection today and let Bros Roofing secure your home.